Stephanie said our thread was getting too long, but without that long, drawn-out argument with Jeff Freedner about the merits of Gamblin art supplies, I would never have learned enough to do what I did.
Ever since I switched to oil paints, a very close second to the question "What do I paint?" has been "What do I paint on?" Back in my airbrush days it was pretty simple: Save up to buy a piece of illustration board, buy it, cut it down to size, curse mightily my inability to cut illustration board straight in any consistent manner, cut it a few more times, apply paint. And I was done.
Switching to oil paints meant finding new supports. Like most people, I suspect, I started by saving up for pre-made Fredrix canvas, but a few paintings taught me that pre-made canvas totally sucks. Around about the time I discovered Gamblin materials -- or was introduced to them by a salesperson at Pearl, anyway -- I decided it was time to stretch my own canvas. I bought stretcher bars, some linen canvas, a canvas puller, and an electric staple gun.
I learned from this that stretching my own canvas was an enormous pain in the ass. It took me forever and I had a hell of a time getting the sides to stay square. The electric staple gun wouldn't actually staple the stretcher bars properly -- that's what I get for buying the heavy duty ones, I guess -- and I never quite got the canvas as tight or straight as I wanted.
And when I finally had the canvas together, I still needed to prime it. I began with Gamblin's PVA size and then I followed that up with Gamblin's Oil Painting Ground, which flows like frog spit in January. I tried using a brush to put it on and ended up with brush marks across this thick, shiny surface. The canvas took weeks to dry enough to be sanded and painted on. I was unhappy with the smoothness I got when my sandpaper got all bound up with icky sticky stuff but I finally surrendered and managed to turn out a painting I rather liked. But I would not be stretching a canvas again.
Gamblin claims on their site that the most durable support for oil painting is canvas mounted on wooden panel. So I decided that would be my next project. I bought a four foot by eight foot piece of 1/2" birch plywood and had it cut down into a few panels for paintings I was planning. I took the excess strip, about a foot and a half wide and eight feet long, and kept it for future projects.
Gluing canvas to wood was much easier than stretching it, but this method, too, had its problems. First, it was messy as all hell. Second, I had to glue the canvas down and wait for that to dry. Then I had to size the canvas with PVA and wait for that to dry. Then I had to smear Gamblin Ground all over it, at least two coats, and wait for that to dry. By the time I was done, I had to wait almost a month before I had a canvas I could work on. And I was really unhappy with how unprofessional the edges looked: No matter what I did, I couldn't get a good flat fold from the linen, and more, the Gamblin Ground dribbled down all around the edges like some insane minimalist Jackson Pollock had been at the canvases when I wasn't looking.
Worse, two of the panels warped almost immediately. This was unacceptable. For my next panel, then, I bought 3/4" birch plywood. This didn't warp at all, but the resulting painting weighed about ninety thousand pounds.
In between all this I made do with canvas paper, which has the benefit of being easy to get, fairly cheap, and easy to experiment with because it's easy to get and cheap. But it is cheap. I did a few paintings on Gessobord, which was okay, but very expensive and limited to small, standard sizes, unless I wanted to spend even more money to order large, custom panels.
For the first time in my life, I was beginning to feel the pinch of not having the right stuff for painting when I needed it. Part of this is because of my art history to this point. You have to understand that until recently, I was a weekend painter. No, not even a weekend painter. I was an annual painter. If I painted two paintings in one year, I was doing well. I was forced to paint this way from the beginning because of a lack of funds and, of course, a lack of time, because I was supposed to be (at first) getting an education so I could (thereafter) get a good job. So my system was pretty simple: I'd walk around performing my duties and living my life, all the while thinking up ideas for paintings. One or two of these ideas would come to the fore, and I'd consider them, and I'd think about them, and I'd paint them in my head, over and over, planning, rehearsing, revising, until I saw how I'd go about it. Then one day, despite all the planning, I'd realize I had to paint RIGHT THIS MINUTE and I'd go off half-cocked, half-assed, and half-dressed, running out to buy whatever I could afford and throwing everything together to paint for three days straight, only pausing to eat, use the bathroom, and sleep. This invariably surprised the people around me, starting with my parents, moving on to my roommates, then my girlfriend and now my wife and kids.
This is why, when Stephanie visited my studio a little while back, when she asked me where my blank canvases were, I looked at her like she had three heads, one of which was singing in German. Having blank canvases would imply that I had a plan for them, which would imply that I was already painting on them, which would cause them to be unblank. So, by definition, I could not possibly have blank canvases.
But this is no way to continue, I thought. I knew I would need blank canvases eventually. I couldn't go on planning my paintings forever. And anyway, isn't it time I grew up a bit and stopped being so lazy and impatient?
Some people have recommended Soho Art's panels to me -- Jim Wolanin in particular -- and some people gave me the names of people who could make me custom panels. All of which sounds wonderful but is still more money than I can afford right now.
So on the spur of the moment a little while back I decided to take that leftover strip of birch plywood, cut it down myself, and make some small panels for me to paint on.
My first mistake was in storing the plywood hanging over some stuff so that the entire thing ended up warped. This left me with three small slightly warped panels. My second mistake was in thinking I could prime them with Gamblin Oil Painting Ground. Alas, Gamblin Ground is meant for canvas, not wood panels. I ended up with three pieces of wood covered with goopy, hoogly nastiness which adamantly refused to become smooth or dry over the course of three weeks.
It was these panels I was complaining about which began the argument about Gamblin products which led to my researching what to do about this painting support problem I've had. Thanks to Jeff, I did enough reading to figure out what I wanted to do next. I'd been planning on buying another four-by-eight sheet of plywood but I hadn't quite figured out how I wanted to handle it.
Jeff suggested a traditional gesso, or maybe Golden acrylic gesso. I found that Gamblin makes a traditional gesso mixture. I was leaning away from true gesso because it contains rabbitskin glue; not because I feel bad for the rabbits (as an amateur cook I've made pretty much the same thing from chicken parts, which is to say stock) but because Gamblin reports that rabbitskin glue is hygroscopic, meaning it sucks up water from the air around it and swells or shrinks depending on the humidity. This is bad for paint film, which can crack over time from this movement.
Some reading told me that there aren't many replacements for rabbitskin glue, though, at least in gesso. So following our blog discussion, I bought myself a sheet of plywood cut down into twelve pieces, some Gamblin gesso, and, for fun, a bag of marble dust.
At home, I found the instructions for Gamblin gesso -- for any gesso -- include letting the mixture sit overnight. Overnight? Who has that kind of time? I set up a batch to soak and considered my other options. Rabbitskin glue. PVA. Maybe I could swap out the glue for the PVA in gesso?
Answer: No. This failed miserably. It dried gray and wiped off as soon as I got it wet again.
Okay. Another recipe online suggested replacing glue with gelatin, which is sort of the same thing anyway, which is collagen from animal parts. It so happened I found, when cleaning my kitchen last week, a few packets of gelatin I'd bought years and years ago for some unknown purpose. So while I was waiting for the rabbits to soak, I made a batch of gesso using gelatin, water, and marble dust and began spreading it on one of my panels.
The result looked questionable. After six or so coats it was gray and I could still see woodgrain through it. Well, there was nothing for it but to go to bed and see how the wrung-out lagomorphs were in the morning.
In the morning I was greeted by my gelatinized panel gleaming on my kitchen table. It was smooth and bright white, like a supermodel's smile. I had never seen a painting surface so beautiful in my life.
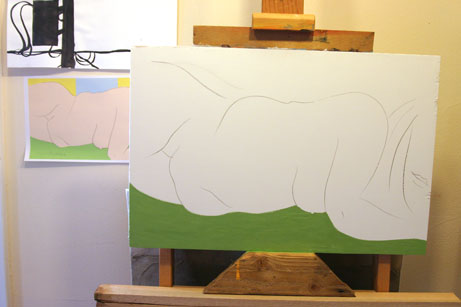
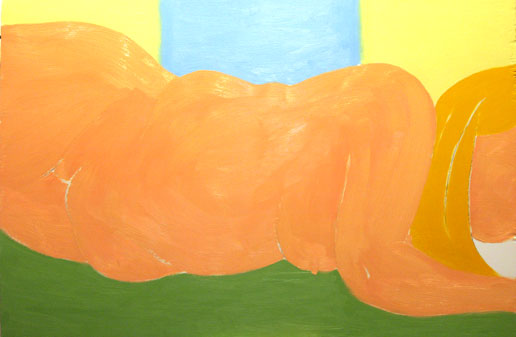
I rabbitized four more panels and while waiting for them to dry I sanded the gelatinzed panel, first with 120 grit sandpaper, then 220 grit. It was wonderful. I immediately brought it up to my studio and threw some paint on it. Here you can see the beginning of the painting in my studio (the corner of my bedroom) with the little study I did for it on the wall. The drawing might look familiar; it's the signature image for my Website and one of my favorite drawings I've ever done. I had pulled it into Adobe Illustrator and filled in some colors to get an idea of how it might work as a painting, and that's what I worked from on this new panel.
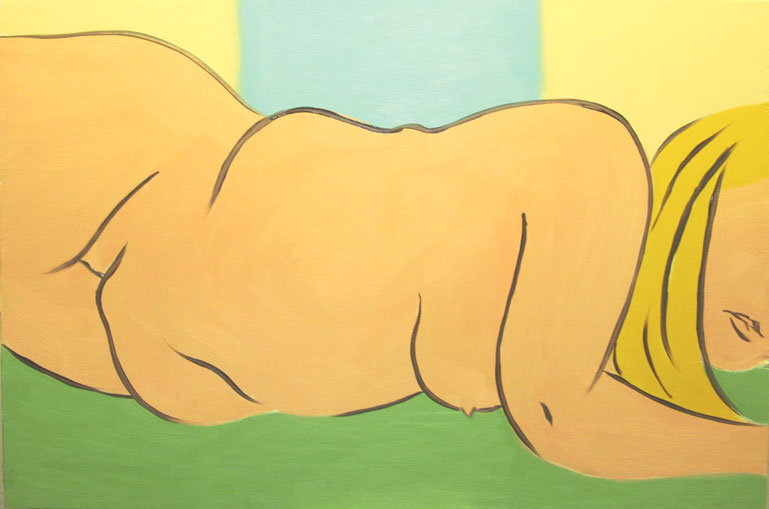
 I had never painted on a surface like that panel in my life. It was really fantastic. Finally I could get my lines out without fighting the weave of the canvas or the lumps of my poorly applied ground. I found I had to adjust my paint mixing -- a little more OMS, a little less Galkyd -- to work with it, but it was just a great feeling.
 I liked it so much that the next day, when my next batch of panels was ready, I attacked them instantly and turned out two more paintings. That's three paintings in two days. And I still have some blank panels.
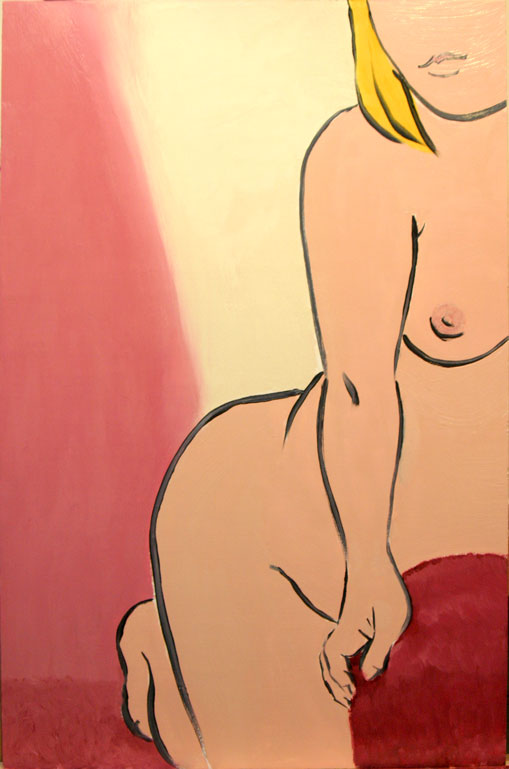
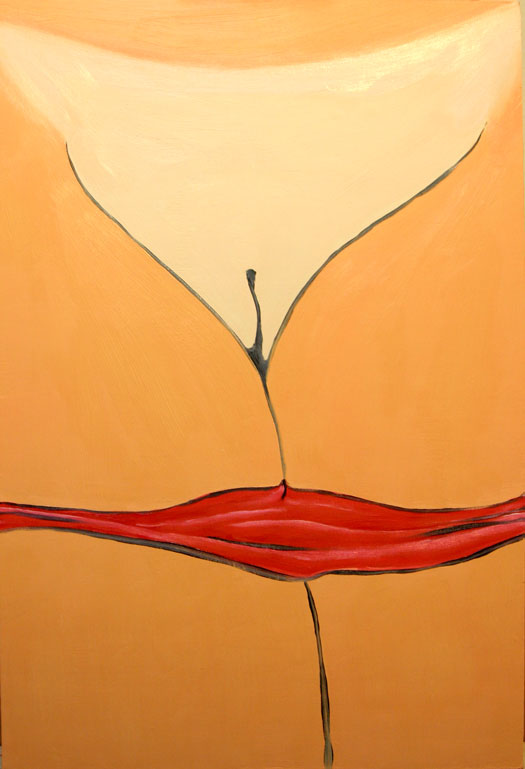
These are a little more Matisse-like than I'd perhaps prefer. And the last one reminds me a little of Peter Stanick, mainly because of the tan lines, but I have an excuse: My first mix of skin tone for that one came out a little dark and thought, what, does she have a tan? So I mixed up a lighter version and used both.
Still, I'm having fun. And now I have a new problem: I have no place to put all these damned paintings.

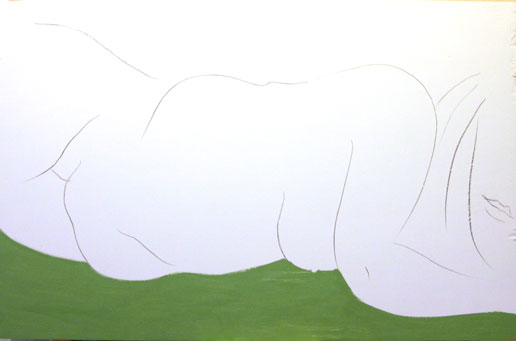
Wow! Congrats! The painting looks great and now I need a nap reading about your travails over the years. What the heck is wrong with wood primer and acrylic gesso?Anyway, glad you can now be super productive with blank panels waiting in the wings and good luck with that storage thing. I have those issues too. In fact that is partially why I need a new studio-somewhere to store all of the paintings I have done that no one wants, but aren't quite bad enough to sand down.And to store all of my blank panels.Also, and this is meant with the best of intentions, have you ever considered not doing the lines in the figure in black (or dark)? You know I like your lines but in this piece I feel like the one before you added the line(#5), somehow had more vitality. I like the hint of white that line the form. I know you have your own vision for these of course, so I am just offering my observation.
Okay, NOW you're getting somewhere. When I painted on panels I had to buy a table saw so that I could cut frame supports for them. They'll warp if you don't do that. As you have discovered. Listen to Tracy--what is wrong with acrylic gesso? I put it on by hand because I LIKED the texture, but for what you're doing, you need a sponge brush and sandpaper. Sponge brushes are about 50 cents at the hardware store. Buy at least 20, they disintegrate.I love the lines and the simplicity. Remember: everything counts. The line quality, the character of the brush stroke, the color, the paint quality. They all have to be singing, and they all have to be you. Don't do anything unconsidered.BTW, I just cannibalized a couple of paintings by taking them off the supports, turning them over, re-stretching and re-priming the linen on the other side. A Turned Canvas. Money and storage issues ARE a bitch.
Tracy asks:What the heck is wrong with wood primer and acrylic gesso?First, I have no idea what wood primer is. Second, a lot of people (online, of course) seem to agree that real traditional gesso is far superior to anything else. And I found it so easy to work with, really, I can't imagine not using it (aside from the planning ahead problem of its soaking overnight).Also, and this is meant with the best of intentions, have you ever considered not doing the lines in the figure in black (or dark)? You know I like your lines but in this piece I feel like the one before you added the line(#5), somehow had more vitality.Don't feel remotely bad about making suggestions like that. Chances are I considered the idea and then didn't follow through for entirely arbitrary reasons.In this case, I did think about not outlining the figure. I've been avoiding outlining things for pretty much my entire painting career. That right there is part of why I did it -- because I've never really done it before. But honestly, while I was making the Adobe Illustrator "study," I was wondering how I'd handle the lines, or if I was even going to put them in.My photos may be misleading, though. I didn't color-correct the "in progress" photos as carefully as the final image, so that one without the outlines looks much more vital than it did in real life. I kind of looked at it when it was done and tried to imagine leaving the lines out, and it didn't quite come together.But I'm still experimenting. I may yet do one without lines. We'll see how it goes.Pretty Lady sez:...you need a sponge brush...I bought a couple of sponge brushes and one of those fuzzy flat brushes for covering large areas. The fuzzy flat brush was great. I covered five panels in two coats in about ten minutes.I love the lines and the simplicity. Remember: everything counts. The line quality, the character of the brush stroke, the color, the paint quality. They all have to be singing, and they all have to be you. Don't do anything unconsidered.Thank you. I am considering everything, as much as I can, anyway. Like the Alizarin Crimson for the background of the second painting: It's the same color I used in mixing the skin tone, which is why the skin tone is on the cool side. Same thing with the Napthol Red of the -- underwear? bathing suit? -- in the third painting, with the warmer skin tone.